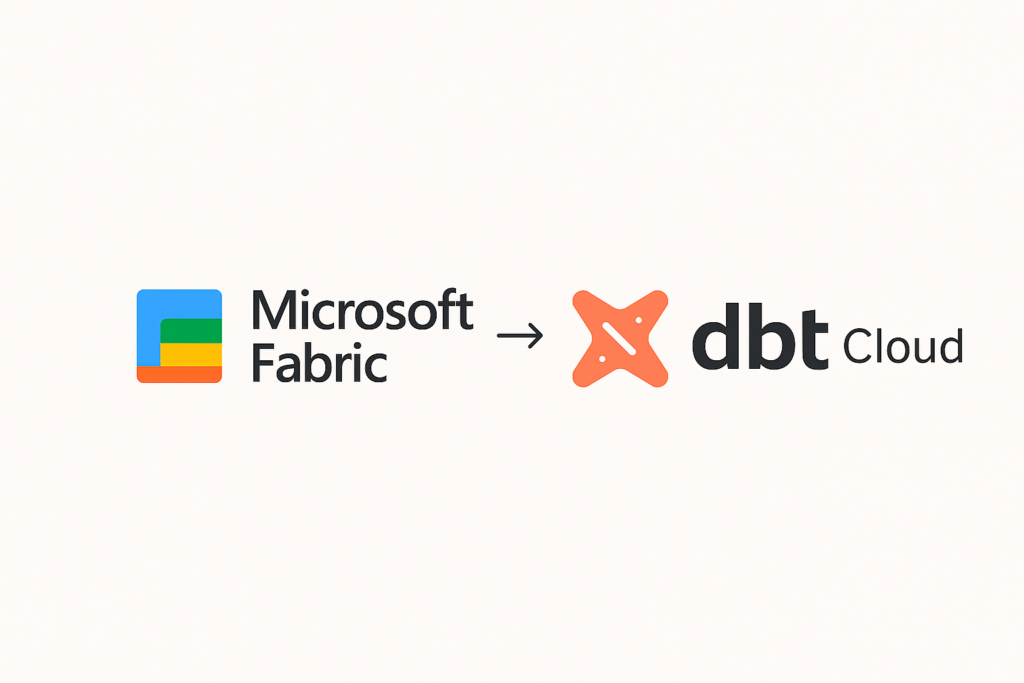
dbt Cloud makes it simple to orchestrate and manage your analytics workflows. In this guide, we’ll walk through configuring Microsoft Fabric Warehouse as a connection in dbt Cloud using a Service Principal for secure authentication.
I will also include all prerequisites, step-by-step instructions, and screenshots to make the setup seamless.
✅ Prerequisites
Before starting, make sure you have:
- A Microsoft Fabric account with admin permissions.
- Access to the Azure portal with permissions to register applications and create secrets.
- A dbt Cloud account (Team or Enterprise plan) with Orchestration enabled.
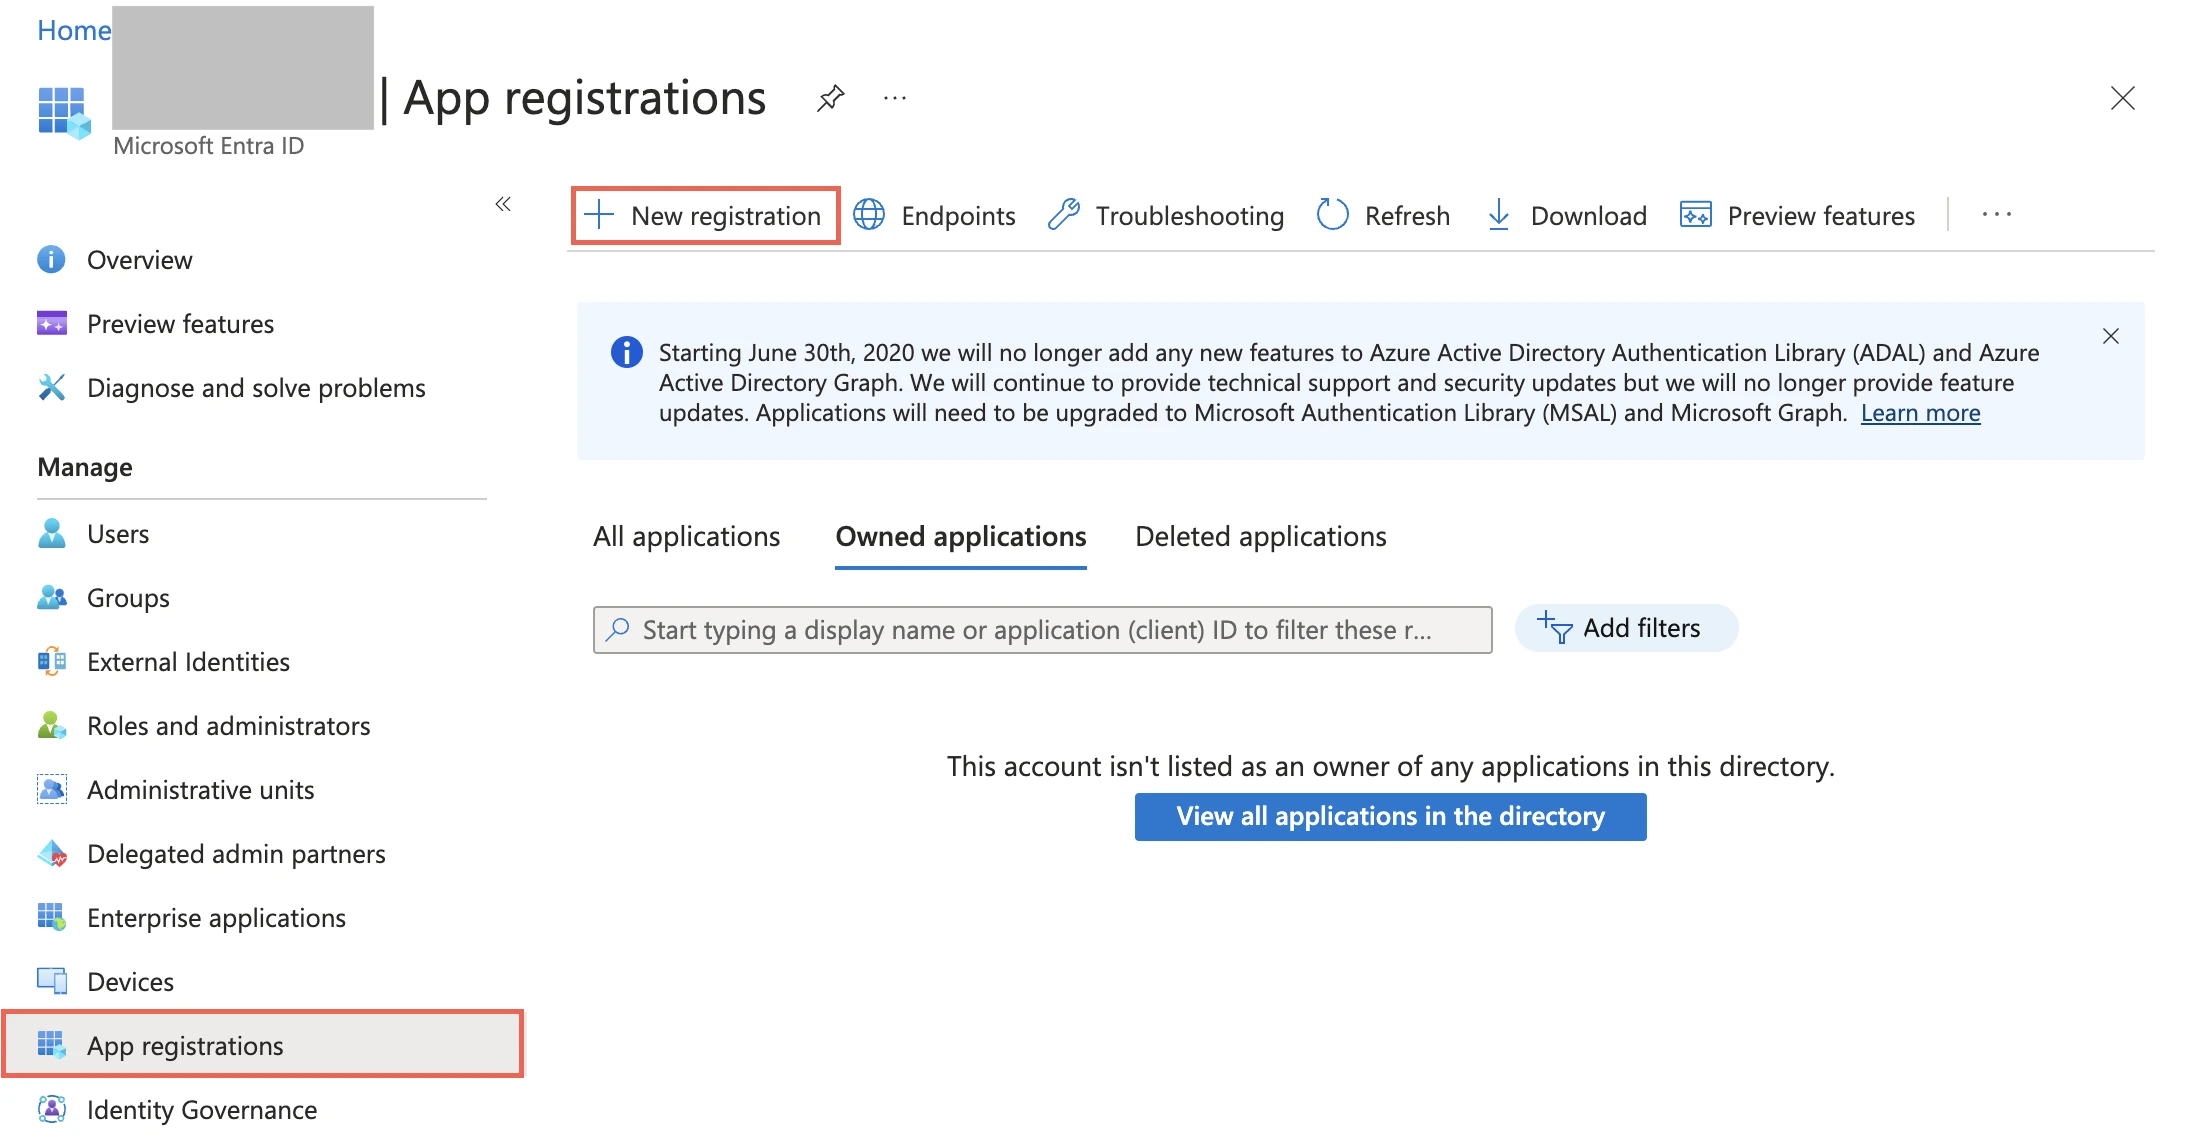
🔑 Step 1: Register an Application & Add Service Principal
- Log in to the Azure Portal.
- In the navigation menu, select Microsoft Entra ID (formerly Azure Active Directory).
- Go to App registrations → + New registration.
4. Enter a Name for your application.
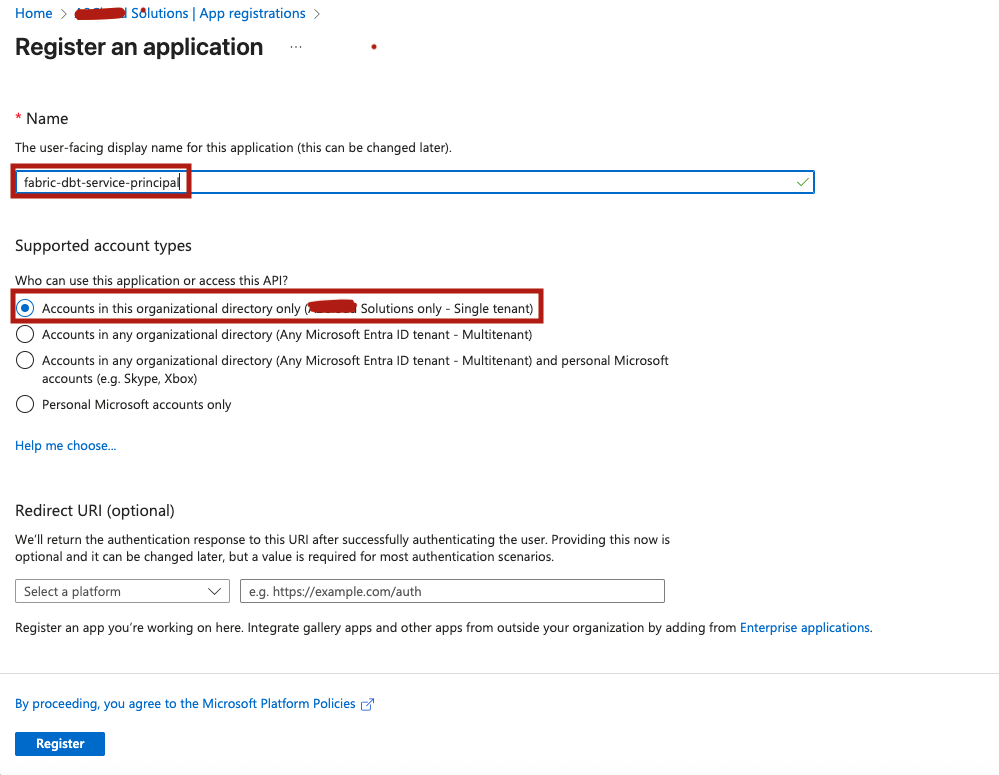
- Under Supported account types, select: Accounts in this organizational directory only
- Click Register.
👉 Make a note of:
- In the Supported account types section, select Accounts in this organisational directory only and click Register.
- Make a note of the Application (client) ID and Directory (tenant) ID These values will be needed in dbt Cloud.

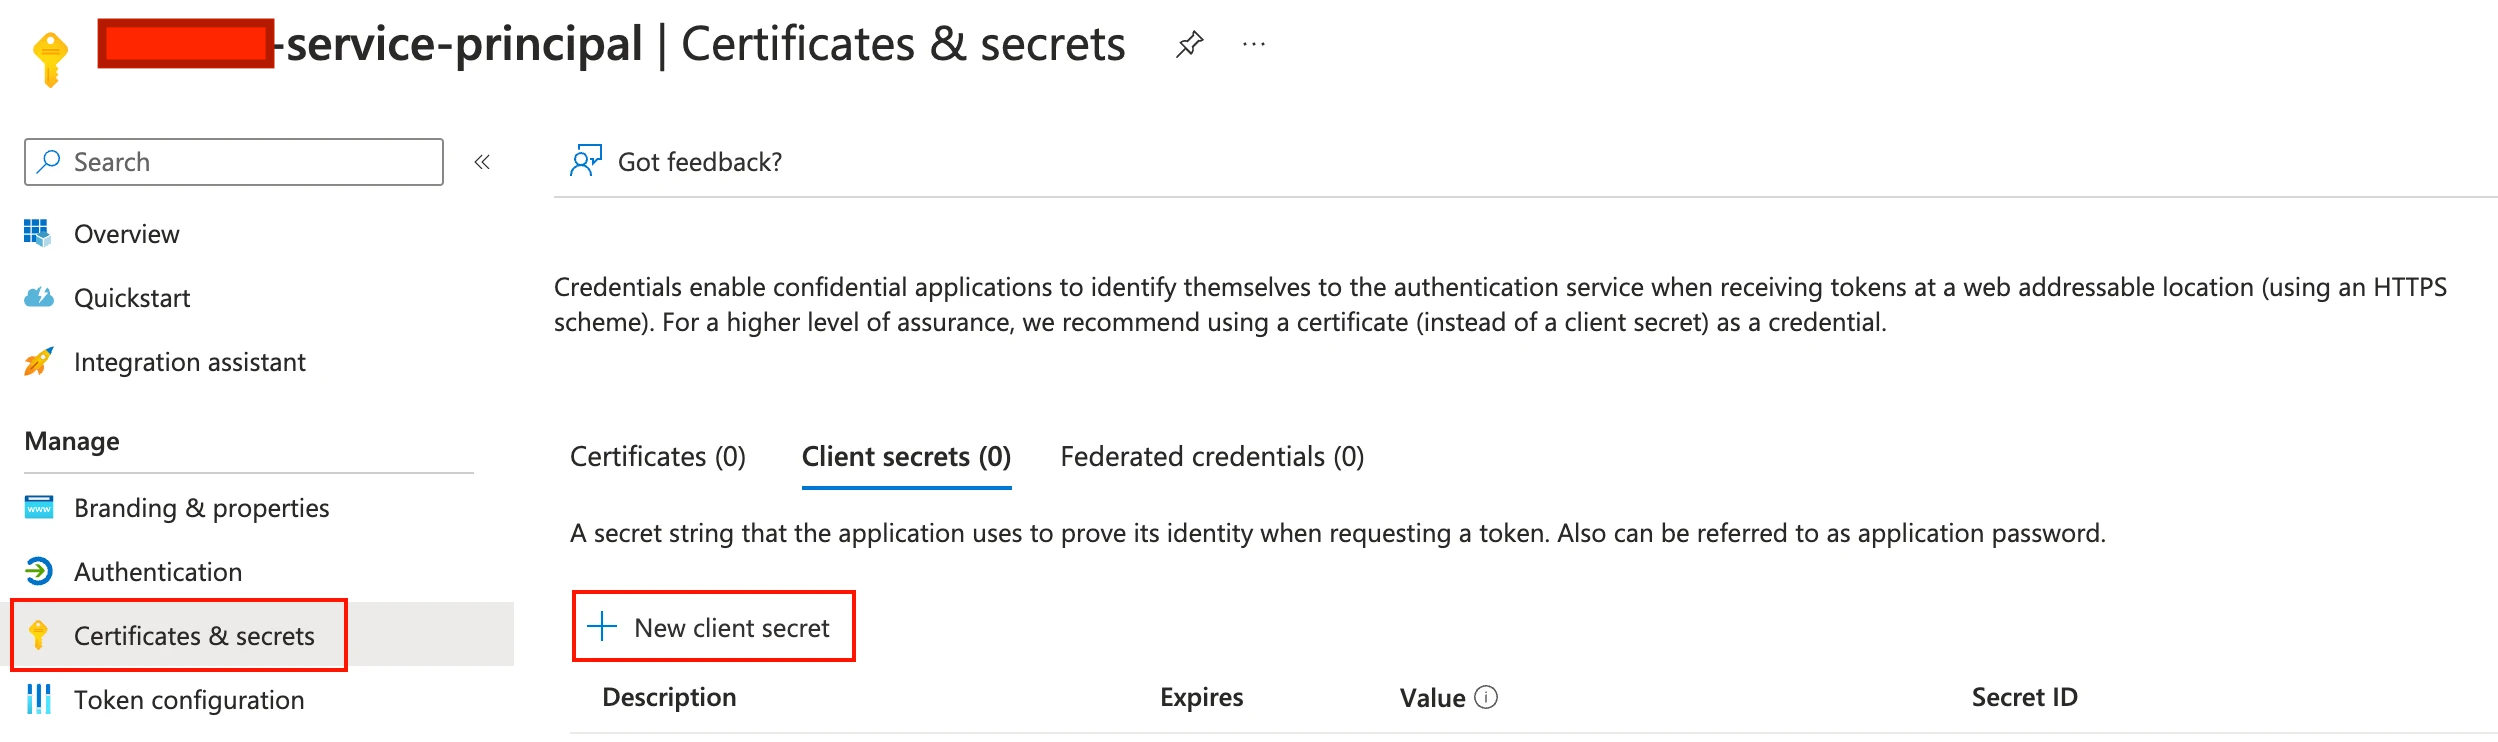
🔐 Step 2: Create a Client Secret
- Open the application you registered in Step 1.
- From the left menu, select Certificates & secrets → + New client secret.
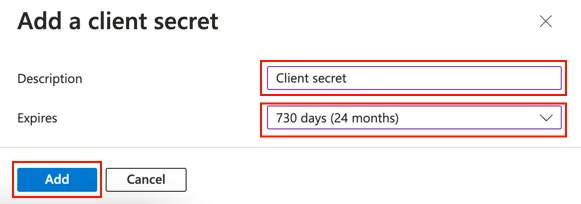
- Provide a Description and select an Expiry period.
- Click Add.
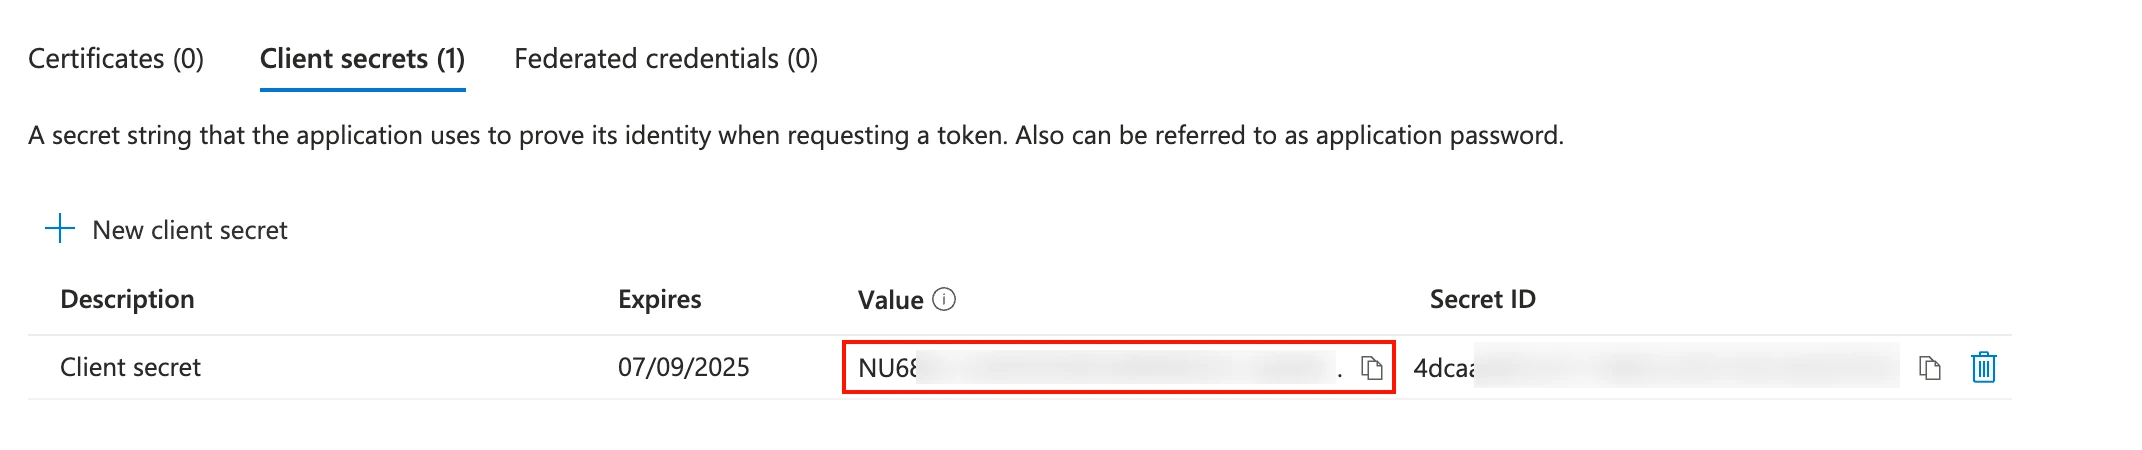
👉 Copy and save the client secret value. You will not be able to view it again later.
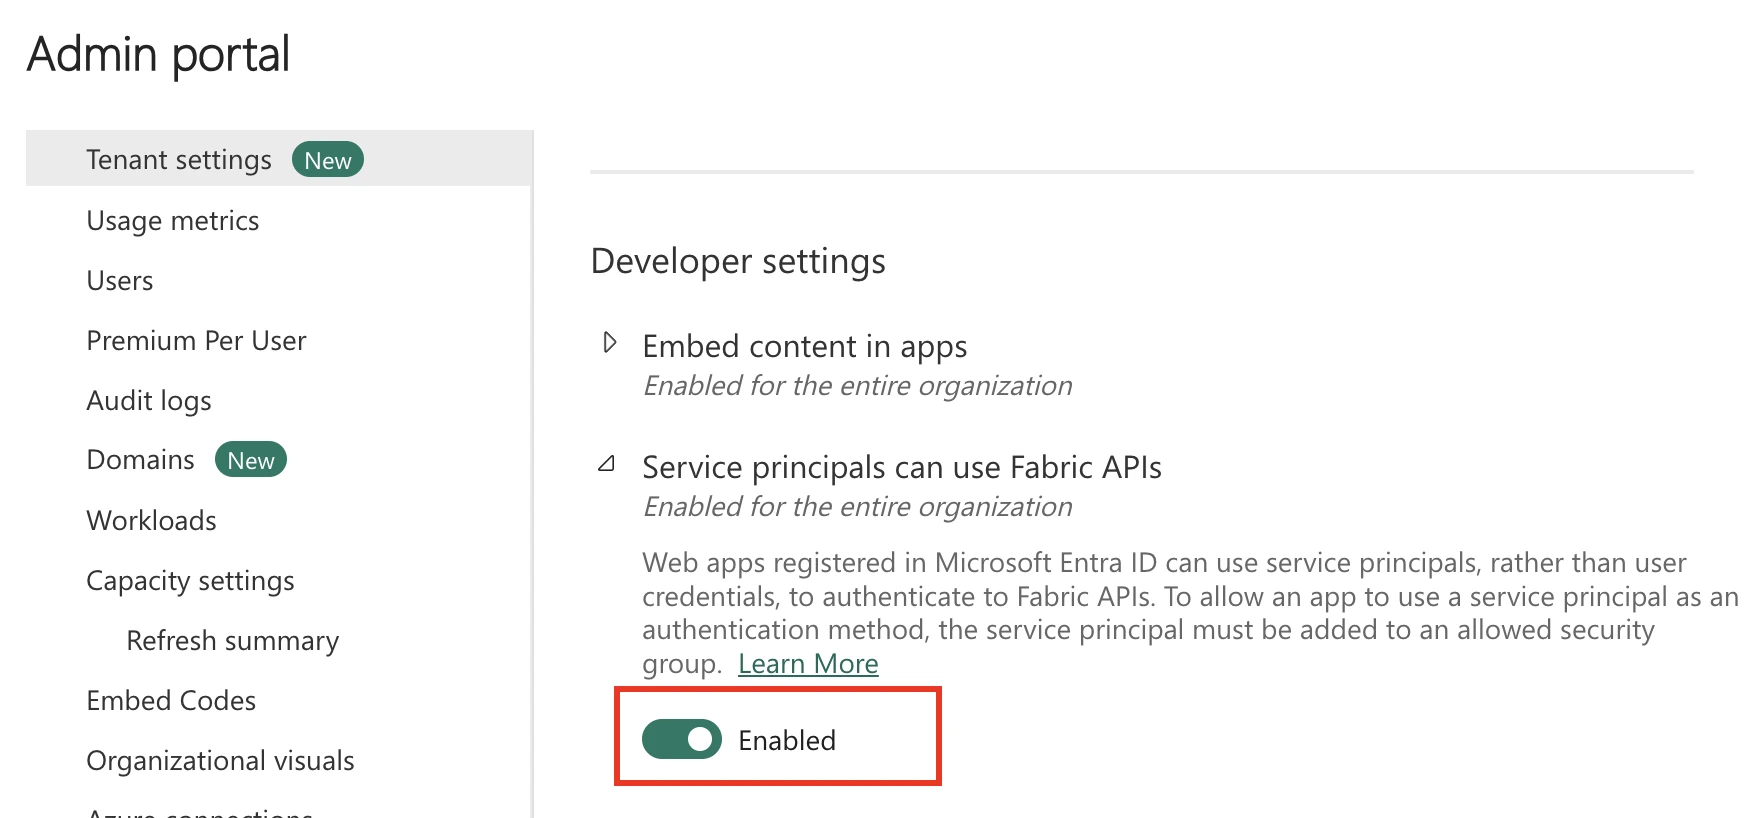
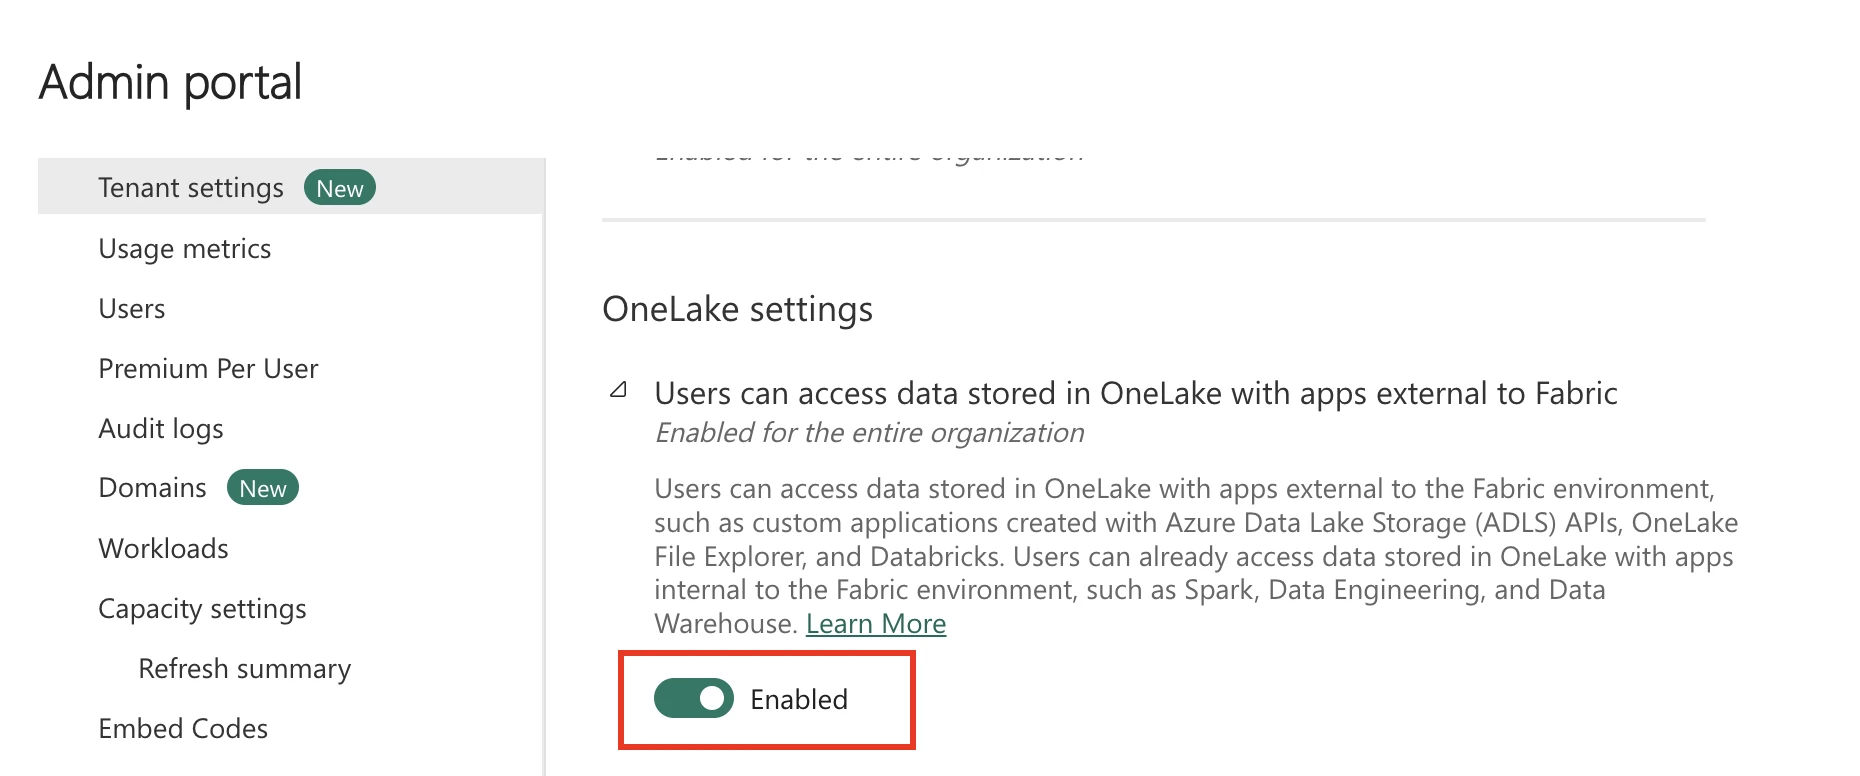
🏢 Step 3: Enable Service Principal in Microsoft Fabric
- Log in to your Microsoft Fabric account.
- Click the Settings (⚙️) icon in the top right.
- Under Governance and Insights → Admin portal.
- Navigate to Tenant settings.
- Under Developer settings, set: Service principals can use Fabric APIs → ON
Under OneLake settings, set: Users can access data stored in OneLake with apps external to Fabric → ON
📂 Step 4: Create a Workspace & Add Service Principal
- From the Fabric navigation menu, go to Workspaces → + New workspace.
- Enter a Name and click Apply.
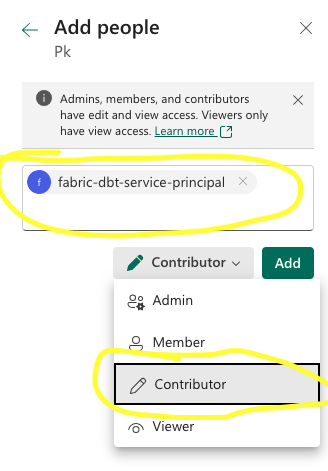
- Select your new workspace → Manage Access.
- Click + Add people or groups.
- Add the Service Principal created in Step 1.
- Assign the role Contributor.
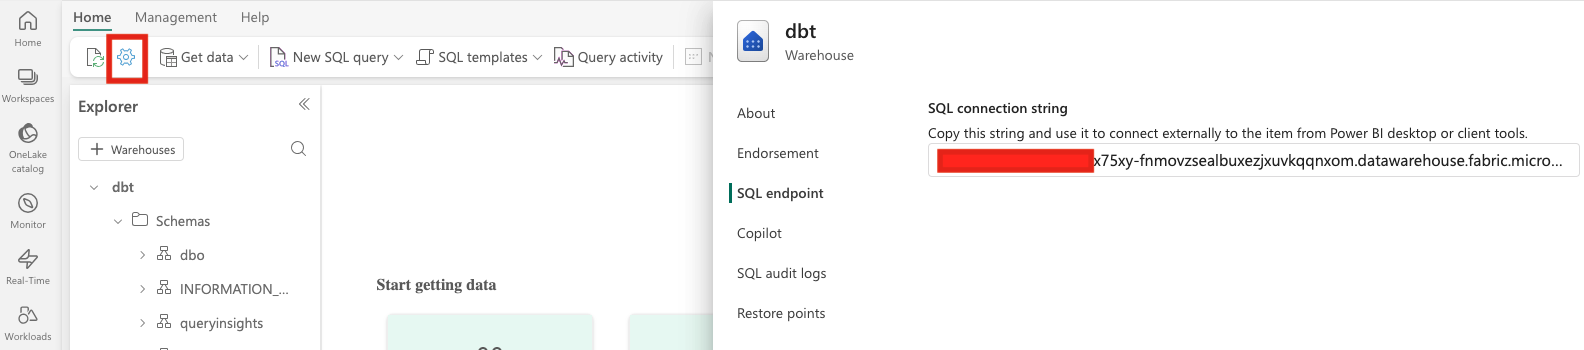
🏗 Step 5: Create a Lakehouse or Warehouse
- In Fabric, click Create → Lakehouse or Warehouse (depending on your use case).
- Provide a unique name and click Create
- Retrieve the SQL endpoint for Lakehouse/Warehouse we use in dbt setup
⚙️ Step 6: Configure dbt Cloud Environment
Now let’s connect Fabric to dbt Cloud.
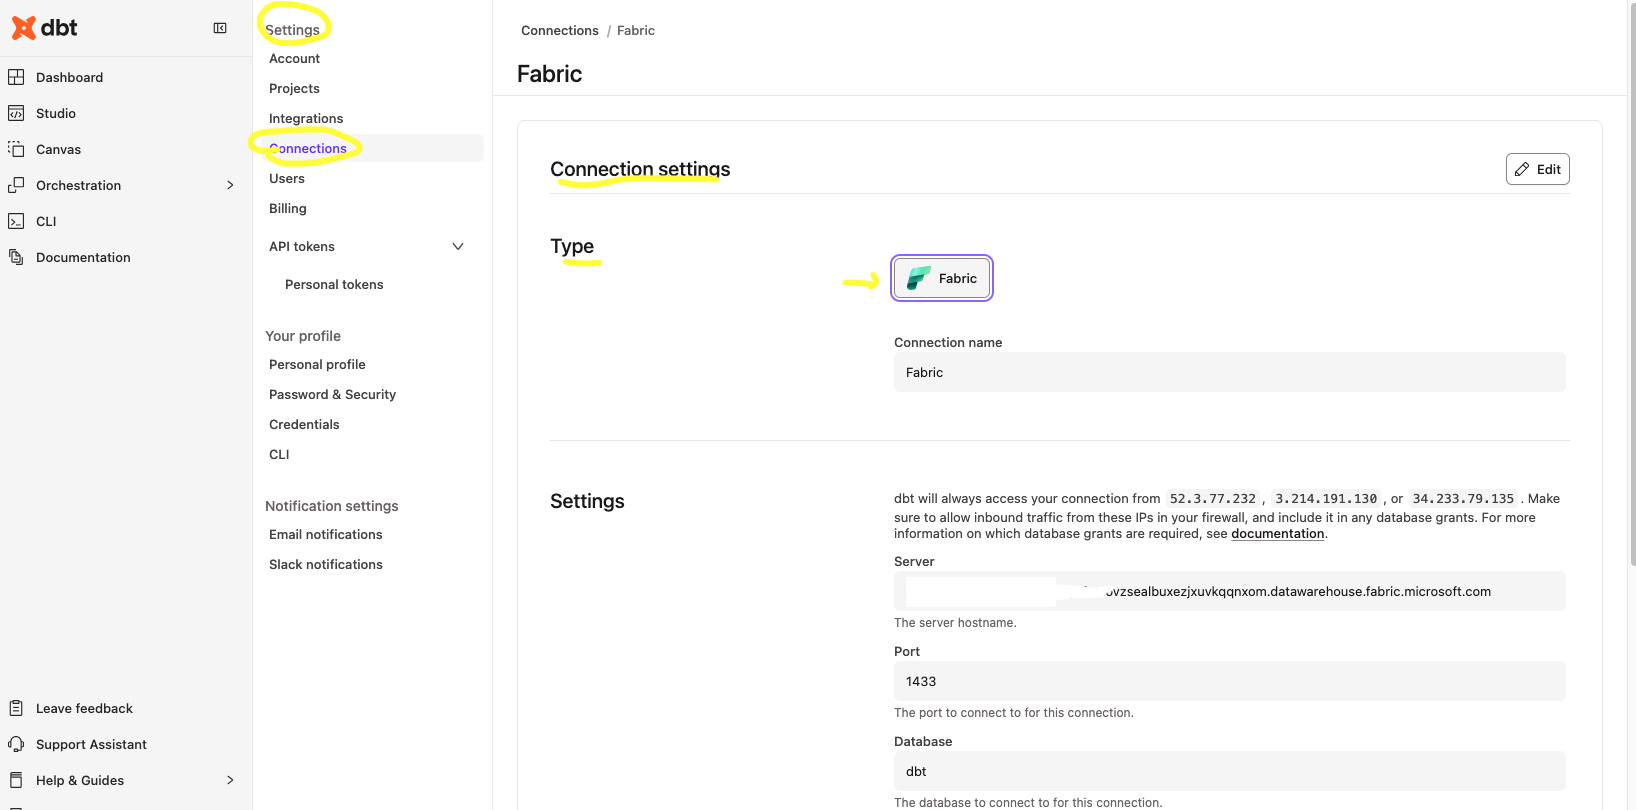
In dbt Cloud, go to Settings → Connections → Connection settings
- Type:
fabric - Settings:
- Server: SQL endpoint from step 5
- port : 1433
- Database: <fabric>
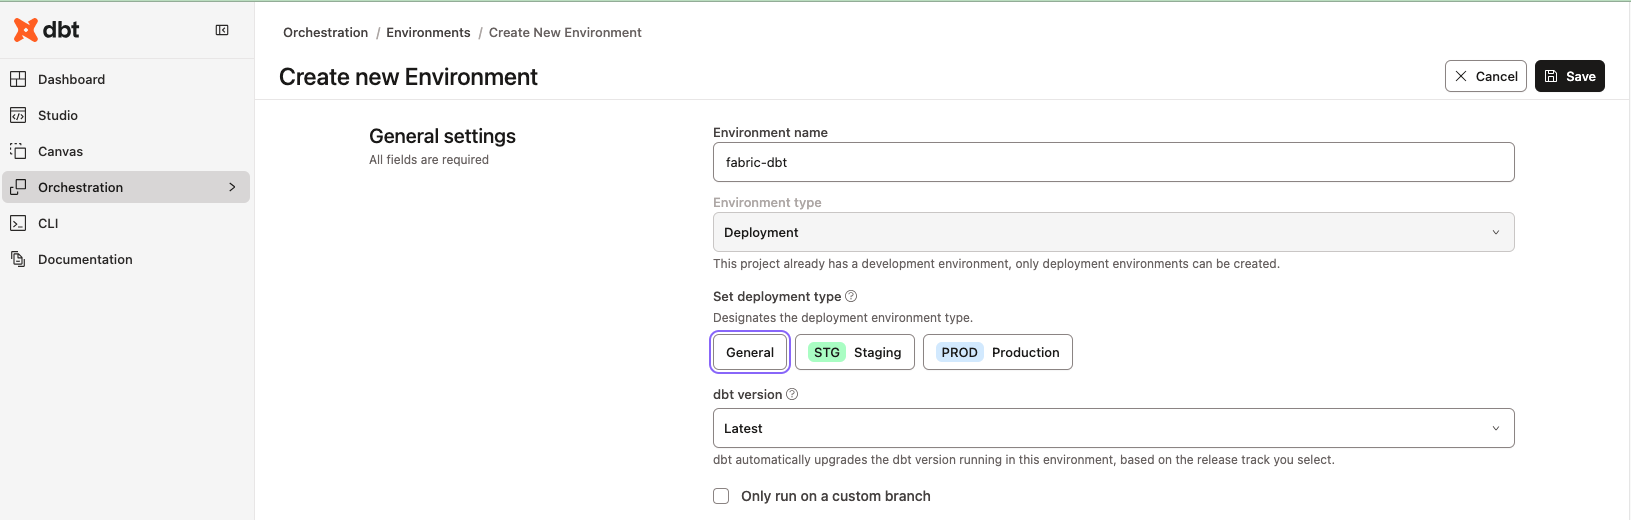
- In dbt Cloud, go to Orchestration → Environments → + New Environment.
- Environment name:
fabric-dbt - Environment type:
Deployment - Deployment type:
STGorPRODas needed - dbt version:
Latest
- Environment name:
2. Scroll down to Connection settings:
- Connection: Fabric
- Authentication: Service Principal
- Tenant ID → (from Step 1)
- Client ID → (from Step 1)
- Client Secret → (from Step 2)
- Schema →
dbo(or your schema of choice)
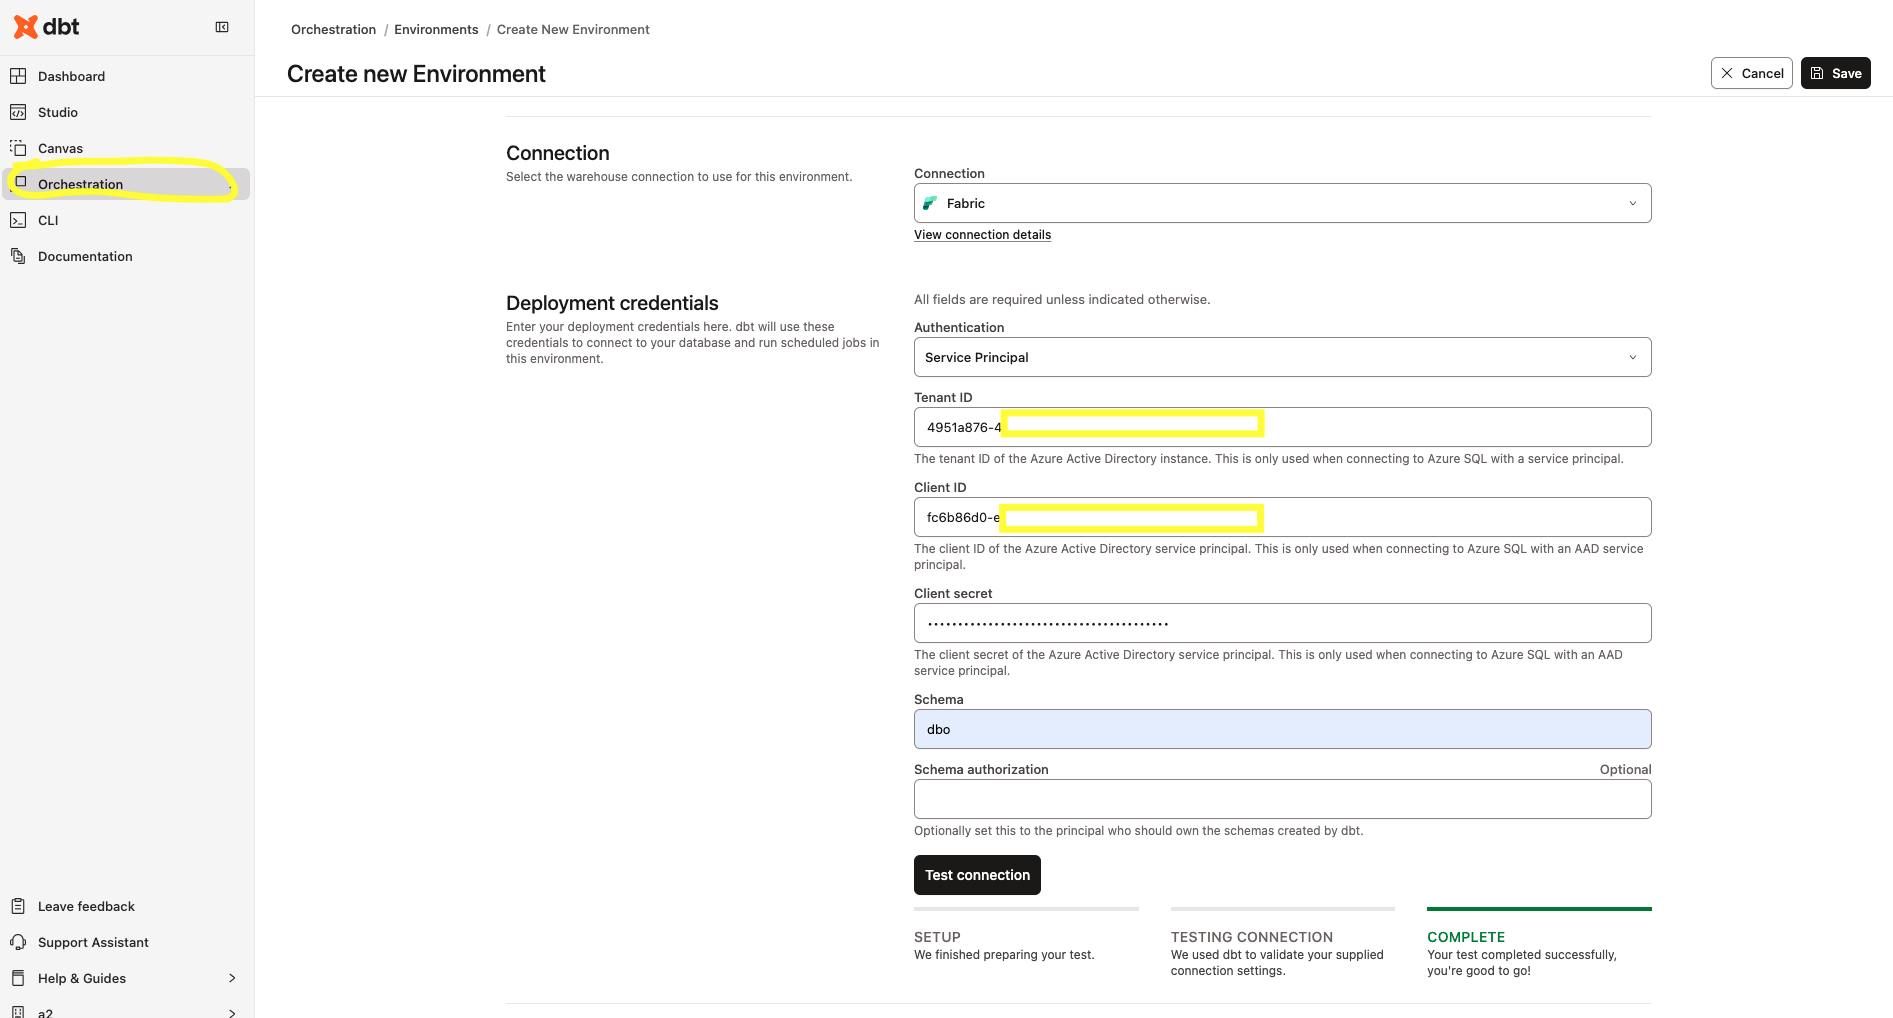
- Click Test Connection.
- If successful, you’ll see: ✅ COMPLETE – Your test completed successfully, you’re good to go!
- Click Save.
Your dbt Cloud environment is now fully connected to Microsoft Fabric Warehouse using a Service Principal.
🎉 Wrap Up
You’ve successfully:
- Registered a Service Principal in Azure
- Enabled Fabric API & OneLake access
- Created a Workspace and Warehouse
- Configured dbt Cloud to connect securely using Service Principal
Now you can start building and orchestrating your dbt models on Microsoft Fabric Warehouse!