Introduction: Transferring data from Azure Blob Storage to Google Cloud Storage (GCS) can be streamlined with Google’s Transfer Service. This step-by-step guide will walk you through the process.
Step 1: Create a Bucket in Google Cloud Storage
Begin by creating a new Bucket in Google Cloud Storage, where your Azure Blob data will be stored. Choose a globally unique bucket name and configure location and other details.
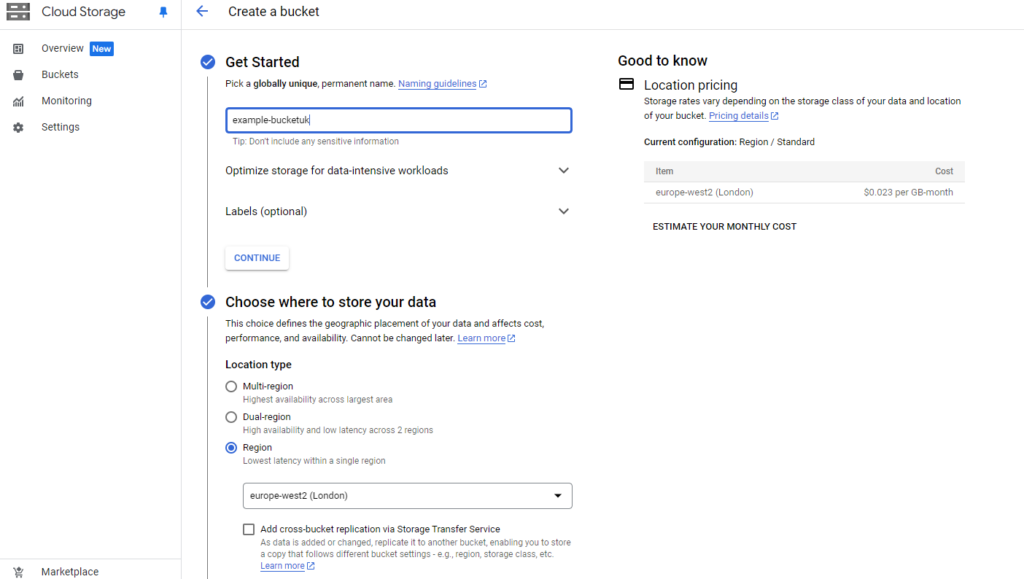
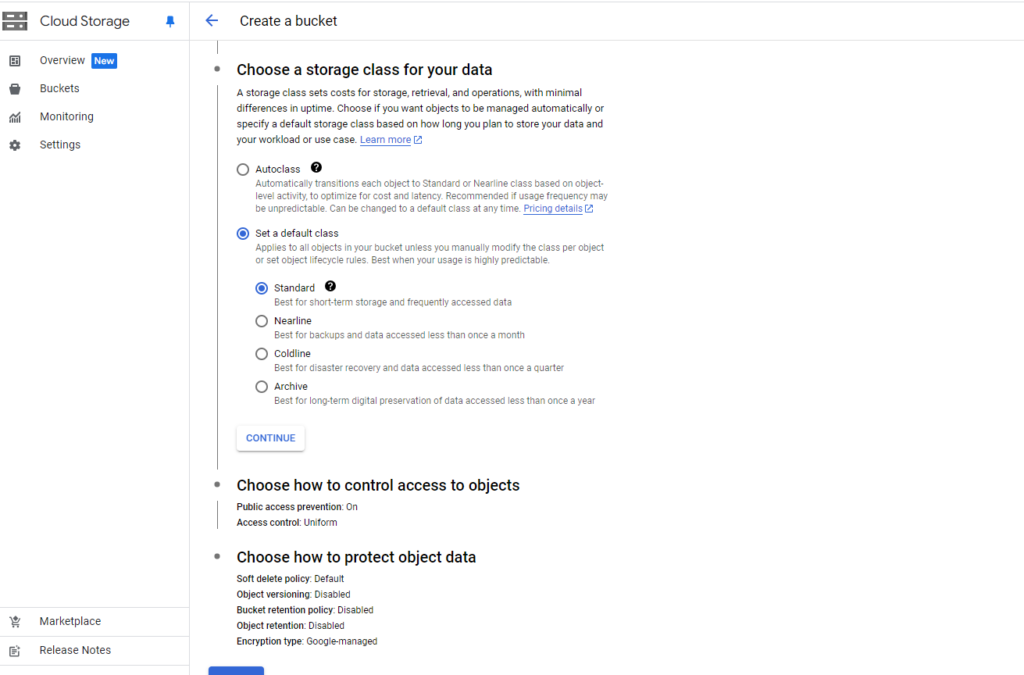

Step 2: Configure the Storage Class and Permissions
After setting up the bucket, choose an appropriate storage class based on your use case (e.g., Standard, Nearline, Coldline, or Archive) and set up permissions for data protection and access.
Step 3: Set Public Access Prevention
Ensure that your bucket is set to prevent public access unless explicitly needed. This step ensures that your data remains secure and inaccessible to unauthorized users.
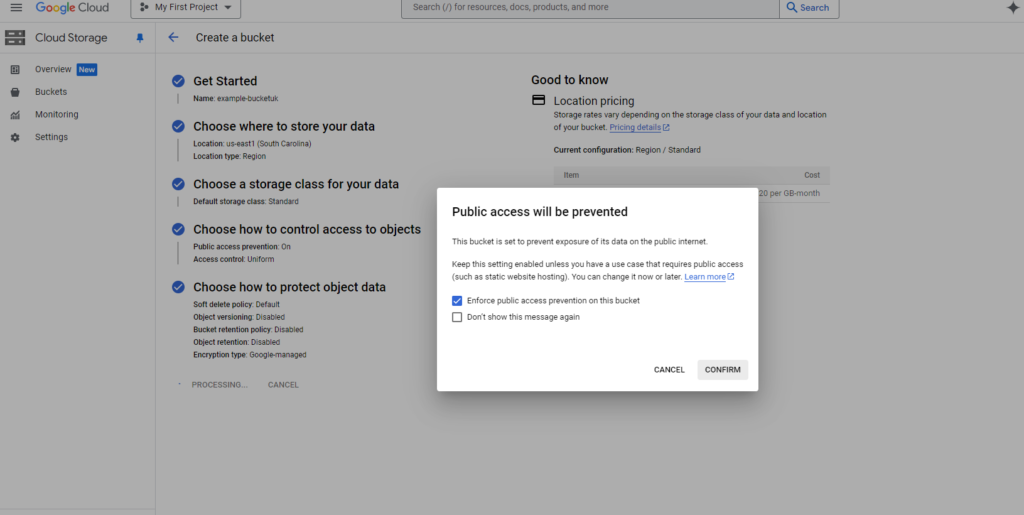
Step 4: Bucket Created and Ready
Once the bucket has been configured with the correct storage class, region, and access control, it’s ready to accept incoming data from Azure Blob Storage.

Step 5: Transfer Data Option in Google Cloud
Navigate to the Transfer Data option in your bucket. This is where you will initiate the data transfer process from Azure Blob to Google Cloud Storage.
Step 6: Create Transfer Job
Now, create a new transfer job in Google Cloud Storage. In this step, you will choose Azure Blob Storage as the source and configure the destination (your newly created Google Cloud Storage bucket).
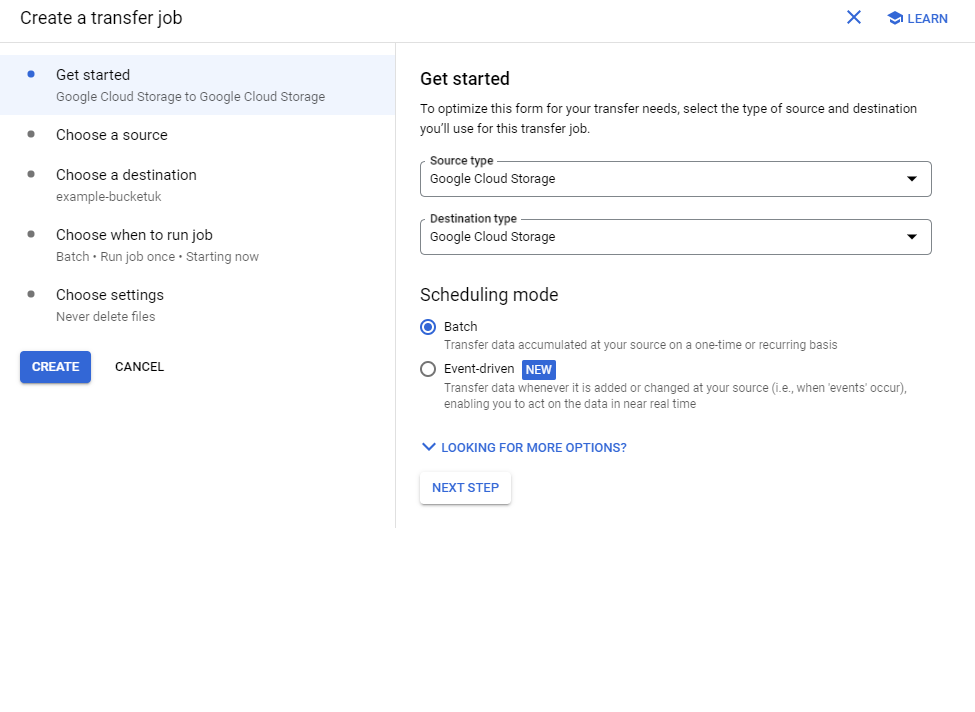
Step 7: Filter Data for Transfer
You can filter the data you want to transfer by setting prefixes (specific folders or types of files) to ensure only the necessary data is moved from Azure Blob to Google Cloud.


Step 8: Scheduling the Transfer
In this step, choose when to run the transfer job. You can either schedule it to run immediately, set a custom schedule, or run it on demand.

Step 9: Choose Transfer Settings
Finally, configure how you want to handle your data. For example, choose whether to overwrite existing files or delete files from the source after transfer. Once these settings are defined, you can start the transfer.

Step 10: Monitor the Transfer
As the transfer job runs, monitor the status on the Google Cloud console. It will show details of the transfer, such as progress and any errors encountered.
Step 11: Enable Logging for Transfer Progress
You can enable logging options in Google Cloud Logging to track the status of your transfer. It is helpful to keep a record of actions like copy, find, and delete, and the status of success or failure.

Step 12: Confirmation of Transfer Job Creation
Once the transfer job is created successfully, Google Cloud will notify you. You can now manage and monitor the job in the Storage Transfer Service.

Step 13: View Folder Browser in Google Cloud
You can now view the contents of your newly created bucket in Google Cloud Storage. The data transferred from Azure Blob Storage will be visible in the bucket’s folder structure.

Step 14: Verify Transferred Data
Navigate through the folder structure of your bucket in Google Cloud to verify that the data has been successfully transferred from Azure Blob. Here, you can check the files transferred into different folders.

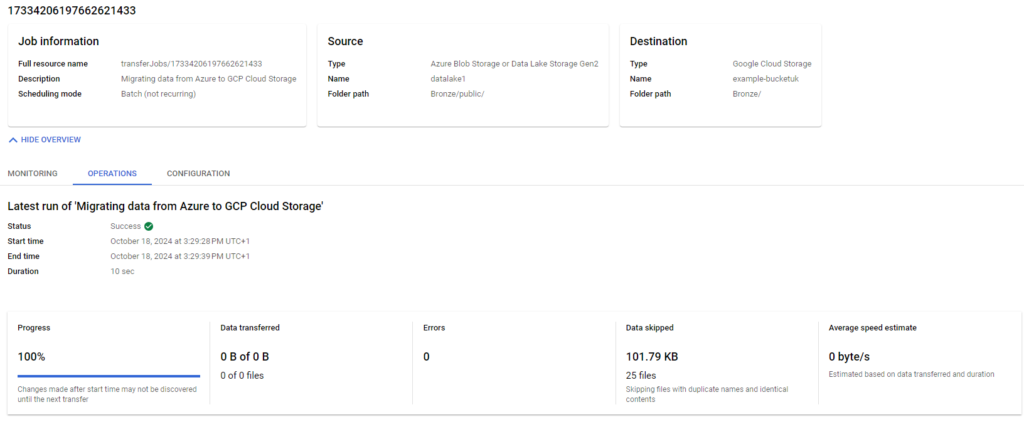
Step 15: Final Transfer Job Report
Once the transfer is complete, Google Cloud provides a detailed report. This includes the status of the transfer, the amount of data transferred, and whether any files were skipped.
Conclusion:
With these steps, you can easily set up and execute a data transfer from Azure Blob Storage to Google Cloud Storage. By following the configuration options outlined, your data will remain secure while being transferred between cloud platforms.
